FAQs – New MIEC Member Portal

Last updated: July 19, 2024
As part of our commitment to continuously improve our exceptional service, we are starting 2024 by launching the latest update to our Member Portal. This update seeks to improve our member’s online experience, by providing more self-service options with an easy-to-navigate interface. If you need help looking for a particular feature check out the frequently asked questions below.
Frequently Asked Questions
How do I reset my password?
From the login page enter your email into the email ID field. Then click “Forgot Password?”
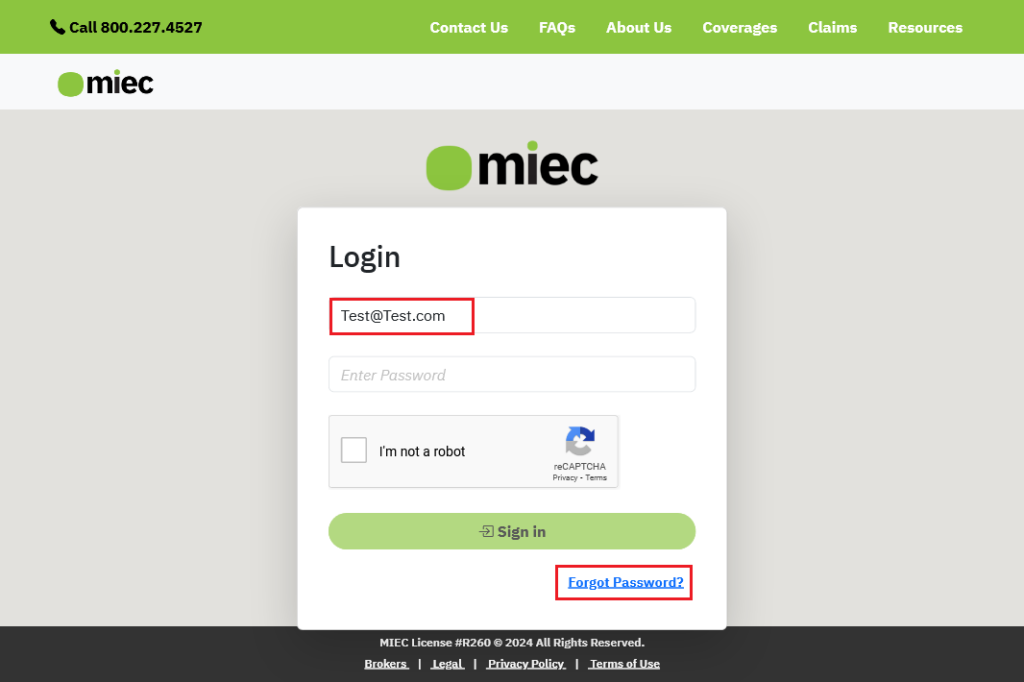
If the email address you entered is tied to your policy you will see a success message pop up in the lower right corner of the screen.

Check your email inbox for a "Password Reset" email from DoNot-Reply@miec.com, follow the link inside the email to create a new password.
You’ll be taken to a page to create a new password. Which must fit the requirements of:
- 8-20 characters
- At least 1 Upper & 1 lower case letter
- At least 1 number
- At least 1 special character (@!#$%^&*)
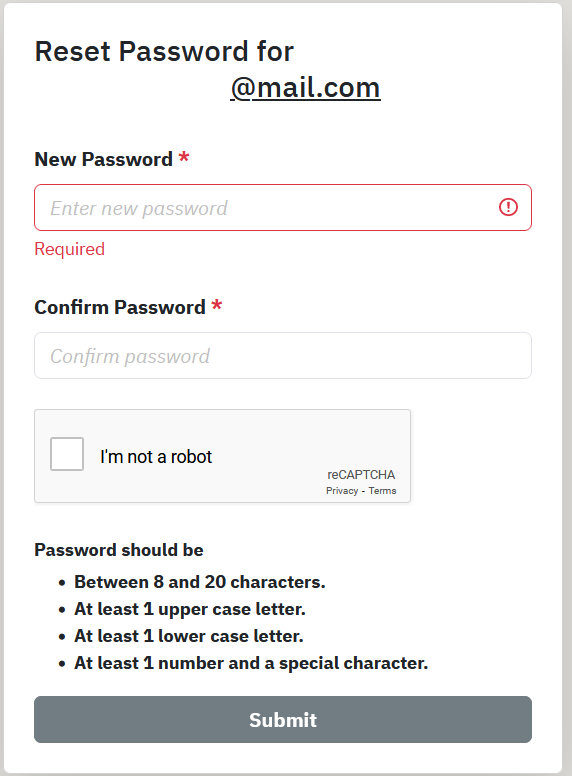
Upon creating a new password you will see the following message and be taken to the login page.

Navigating the new dashboard
Desktop:
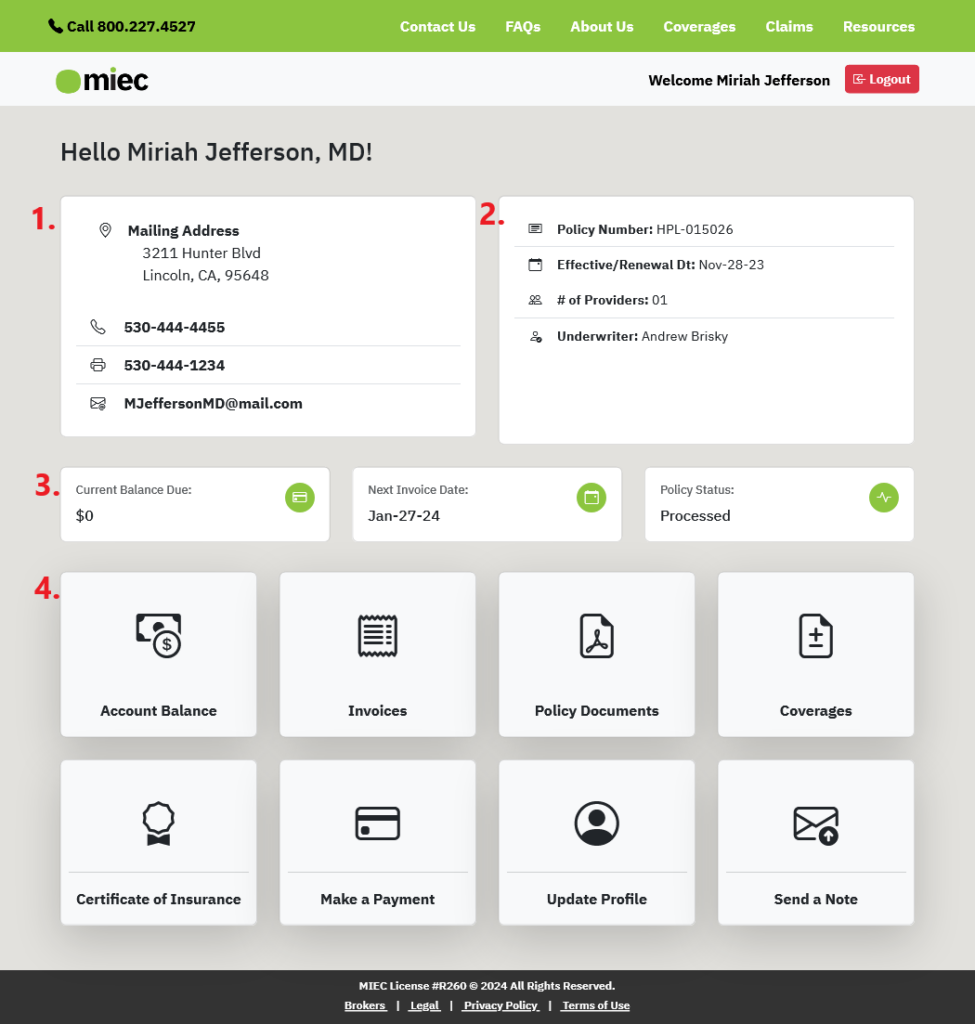
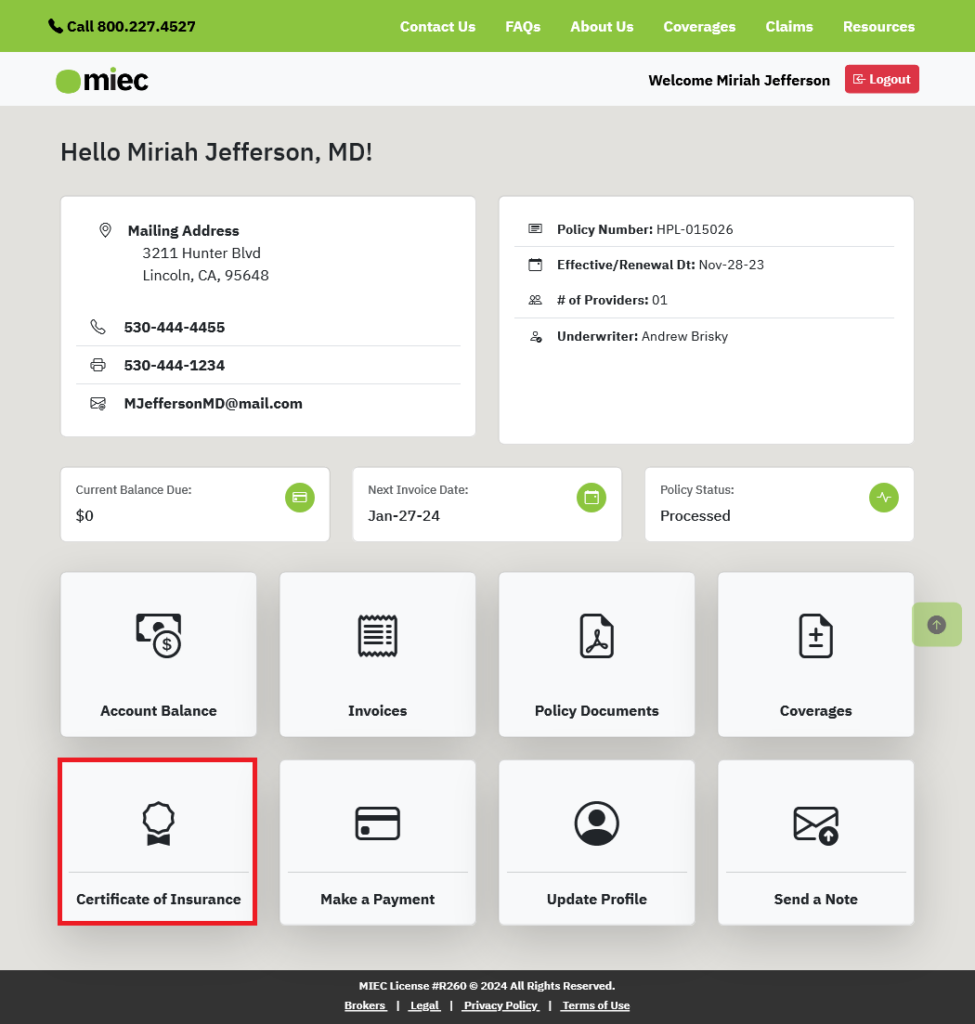
When you log in you’ll be greeted with the new dashboard. Here you can quickly find:
- Policy contact information.
- Policy details.
- Current balance, next invoice date, and current policy status.
- Quick link tiles to all aspects of managing your policy.
Mobile:
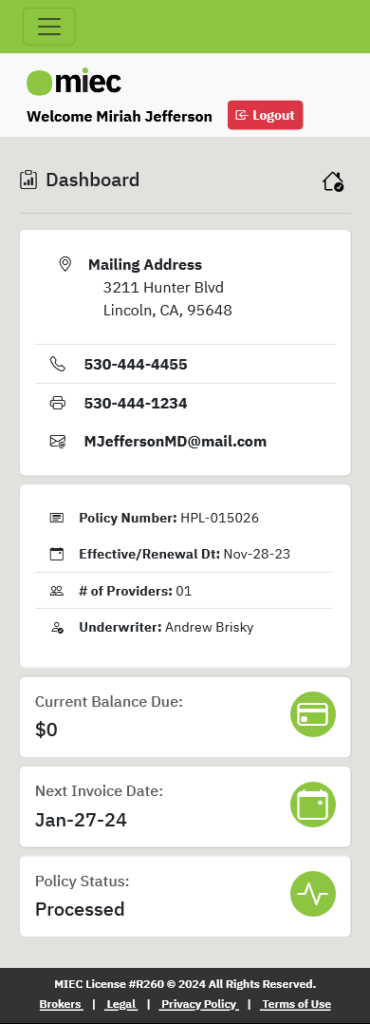
If you’re accessing your account from your phone you’ll have a slightly different view. The main policy information will now be behind a dashboard tile. Upon logging in you will see the following:

Clicking Dashboard will take you to your policy details. Hitting the home icon in the top right corner will take you back to the main navigation.
How do I access my policy documents?
Policy documents are accessed from the dashboard by selecting the Policy Documents tile.
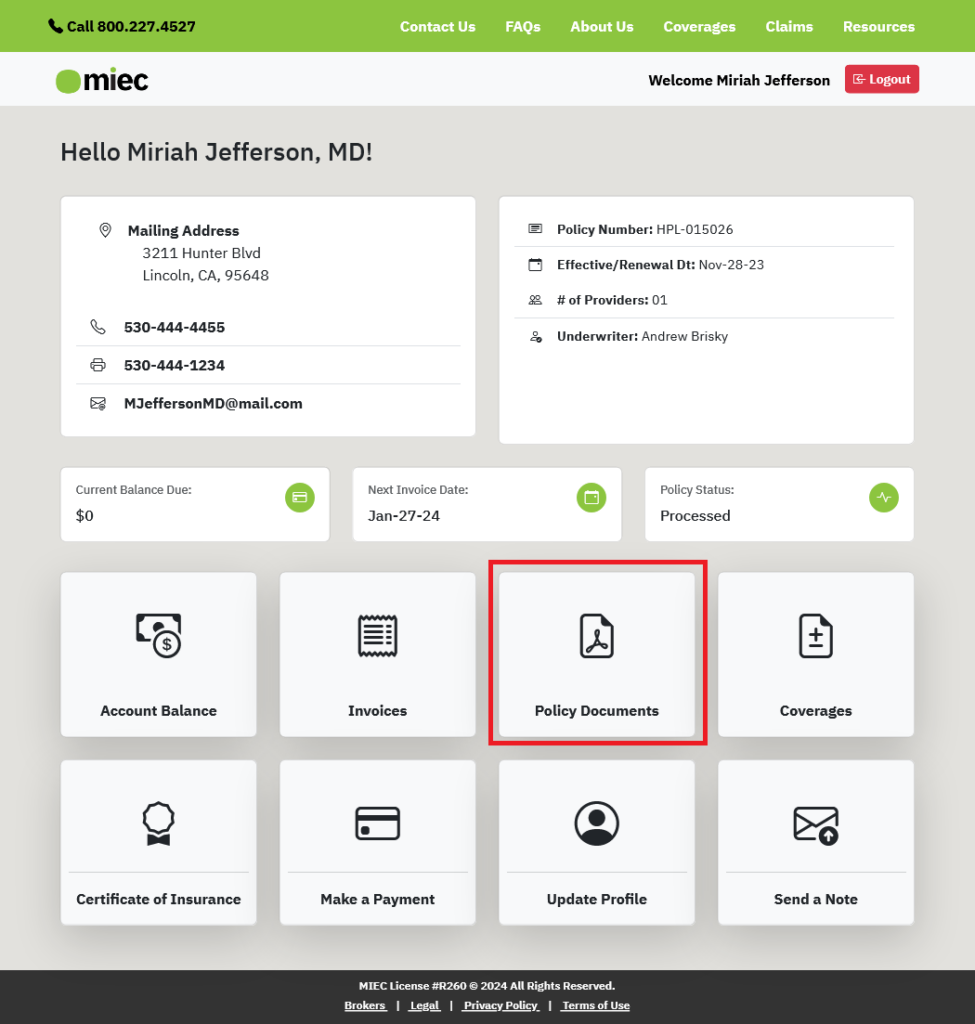
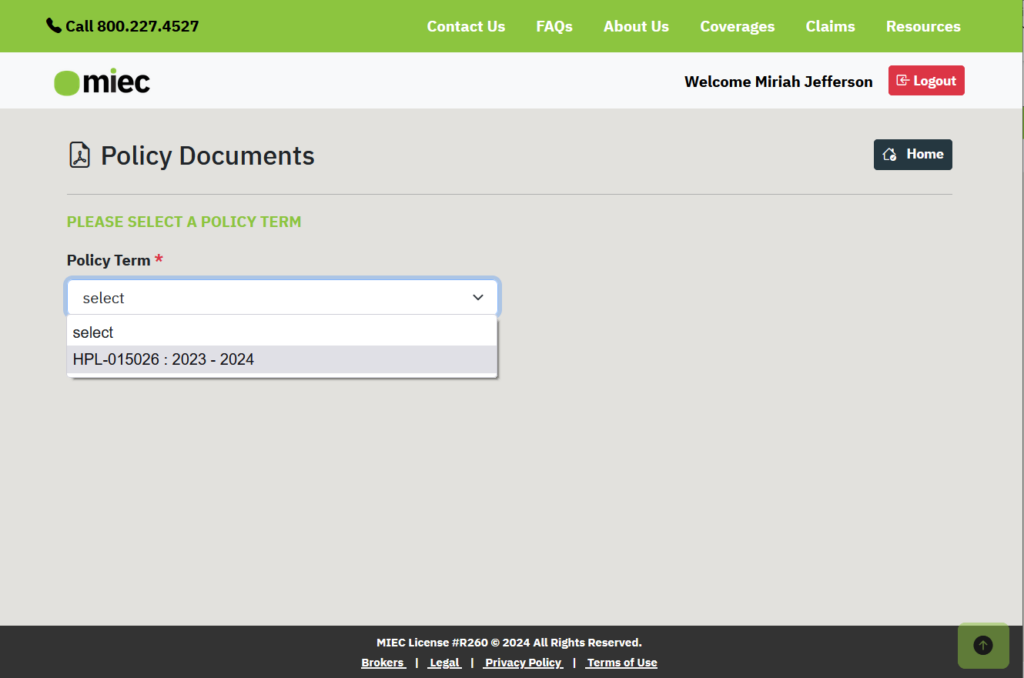
You will be taken to the Policy Documents page and will need to select the policy year you wish to view from the dropdown menu.
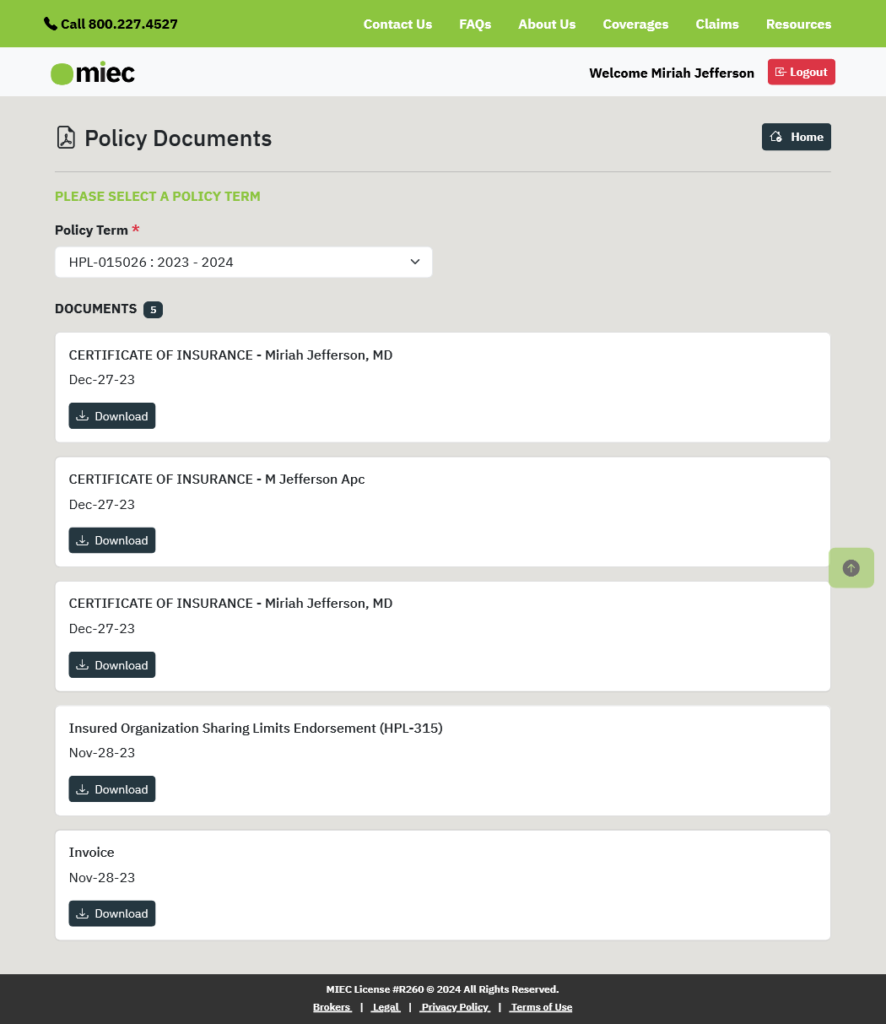
After selecting the policy year you will see all documents that have been generated for that year. Simply click on the download button to start downloading the document of your choice.
How do I make a payment?
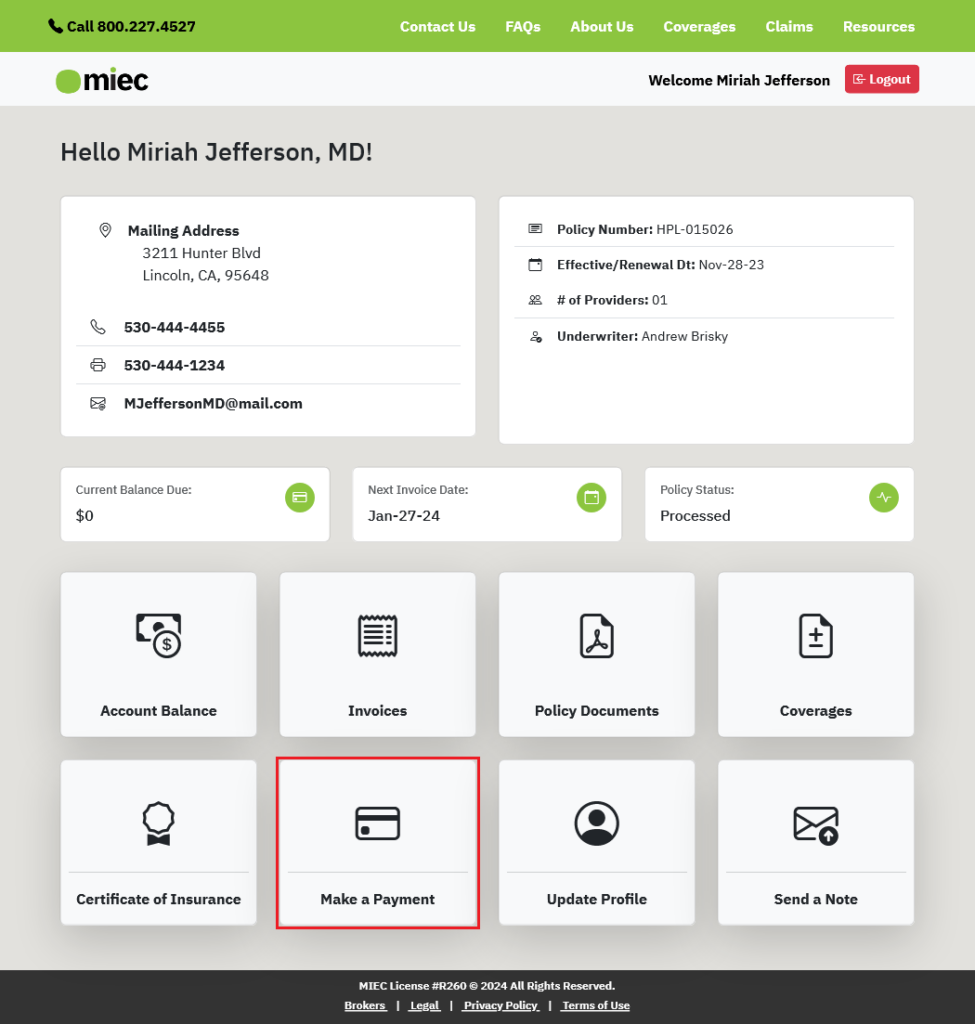
Once logged in, click on the Make a Payment tile.
After the page is loaded you'll be presented with the following information.
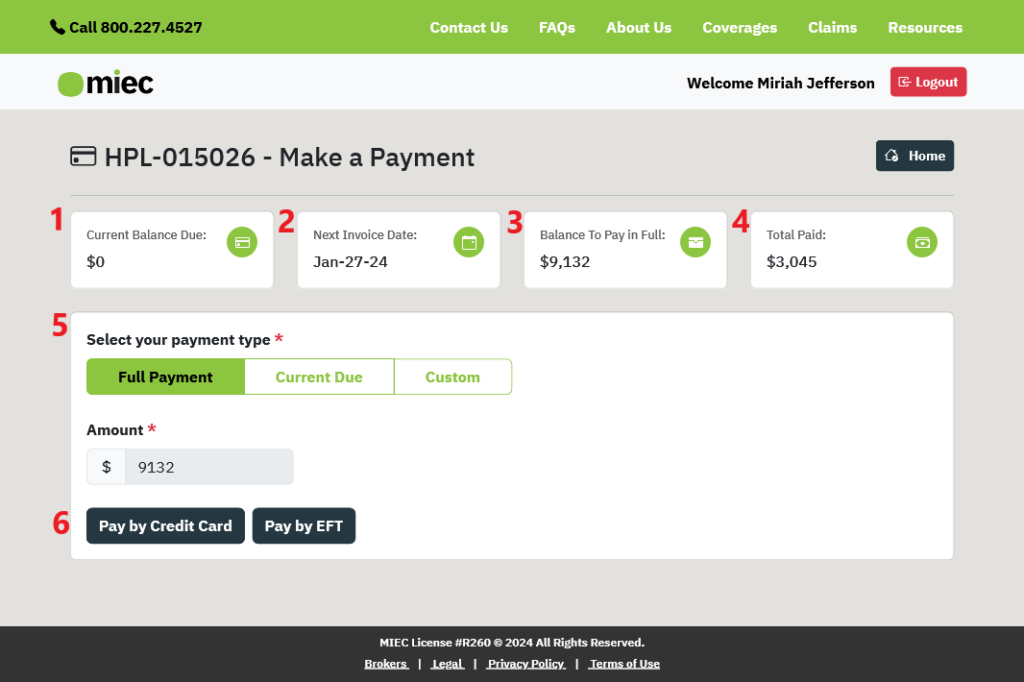
- This is your current balance due. If you're on a quarterly payment plan and have made your payment for the period this will show a balance of $0.
- This indicates when you'll be receiving your next invoice. This varies depending on the payment plan your policy is on.
- This shows how much remaining balance you have on your annual premium.
- This shows the total payments that have been made in the policy year.
- "Select your payment type" allows you to pay:
- The remaining balance with "Full Payment"
- The amount due on your current invoice
- A custom amount that will go against your remaining balance.
- You can pay by Credit Card or through a bank account via EFT
Once you decide what type of payment you would like to make simply click on "Pay by Credit Card" or "Pay by EFT" and you will be taken to a new payment transaction page where you can process your payment after entering your details.
If you ever need to cancel and go back to your dashboard, simply click "Cancel" and then click "Return to Client".
How do I set up Auto Pay (Recurring Payments)?
- Login to the MIEC Member Portal
- From the Dashboard click on the Make a Payment box.

- Scroll down to Setup/Manage Recurring Payments

- Select CC or EFT from the mode of payment drop-down.
- If you have no payment methods on record, click "Add New Card" or "Add New Bank Account"

- Enter your Card / Bank Information and hit OK.

- Once Added you will now see your payment method selected and highlighted in green.

- If you have no payment methods on record, click "Add New Card" or "Add New Bank Account"
- Check the box authorizing Recurring Payments
- Click "Setup Recurring Payment" button
- You will see a success message pop up in the bottom right

- Your Make a Payment Page will now refresh and show the payment method you have selected at the top of the page

- If you return to your dashboard home page, you will see two new features.

- Autopay: Method [Account] under the right policy details column
- Payment Method: [Current account set up for autopay]
How do I change the method of payment used for Auto Pay?
When you log in to the MIEC Member Portal you will see what payment method you currently have set up for Auto Pay. If you would like to change this follow these steps.

- Go to the "Make a Payment" page.

- Scroll down to “Setup/Manage recurring payments”
- Select CC or EFT
- Once selected you will be shown the existing cards or accounts available. In this example, we want to swap from the x4444 card to the x4242 card.

[NOTE]If you've only used one payment method you will need to click the "Add Credit Card/Bank Account" button. Once added the new method will be highlighted in green, as seen above. - Pick/confirm the account you would like to use. We want to use x4242, so we select it.

- Check the authorization box and click Setup Recurring Payments.
- Once processed you will see a success message and the card you selected (x4242) is now marked as preferred.

- You can remove any previous CC/Account by clicking on the trashcan icon.

then confirm you want to remove the card from your policy.

- Your Auto Pay is now updated to the new payment method. You can confirm this at the top of the make a payment page or by going to your dashboard home page.
How do I change my payment schedule?
To change your payment schedule please contact Member Services via the Send a Note page on your dashboard, by email at service@miec.com, or by calling 800.227.4527
Most MIEC policies are on a quarterly payment schedule. Auto-payments, full payment, and 10 monthly payments are also available.
Full payments can be made at any time from the Make a Payment page. Your account balance and billing information will be updated accordingly.
How do I view my latest invoice?
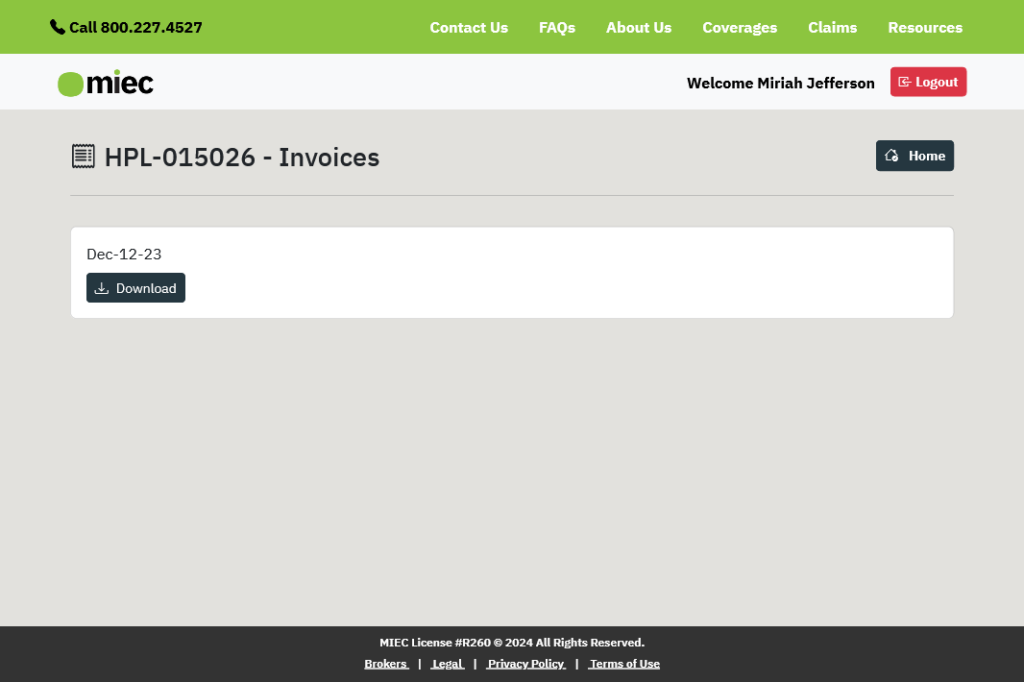
To view your latest invoice access the "Invoices" tile from the main dashboard.
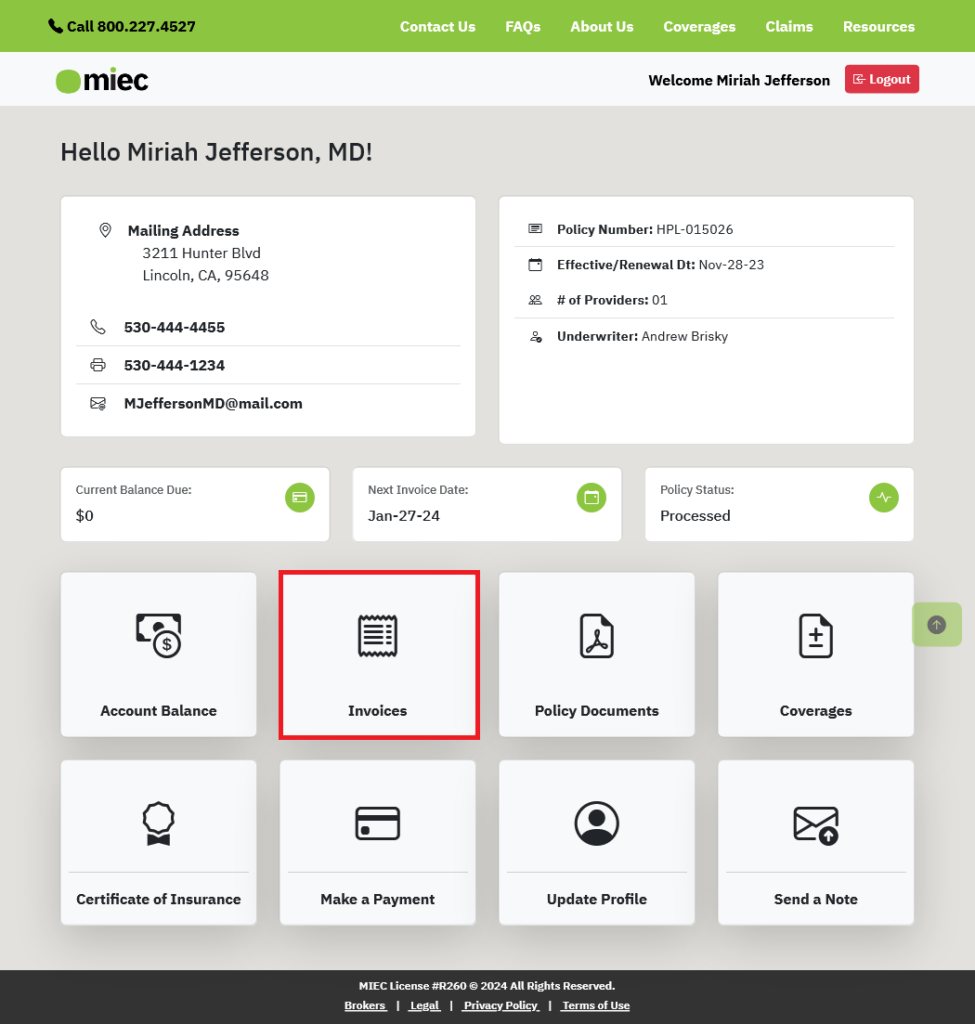
You can now view all of your invoices that have been generated this policy year, with the latest at the top. Confirm the invoice due date if you're uncertain which to download. Click download to get a PDF copy.
How do I update my contact or practice information?
Please Note: All profile updates are sent to Member Services for review before they are applied to your account. This is to ensure there are no changes that may impact your coverage.
If you need to update your phone number, email address, or practice address click on the Update Profile tile from the dashboard.
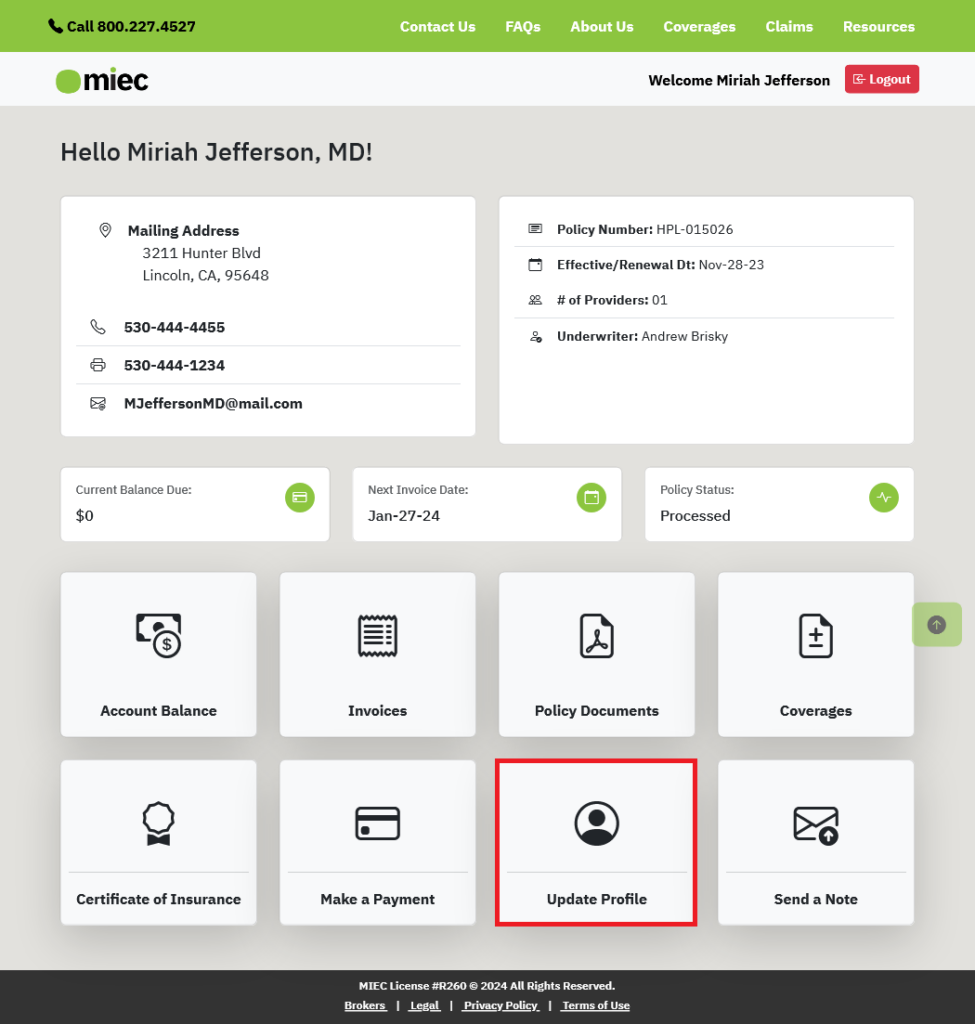
From here you will be able to update the contact information we have on file. Please note, if pasting in a phone number it must be in the xxx-xxx-xxxx format to be accepted. Manually entering the number will automatically apply this formatting.
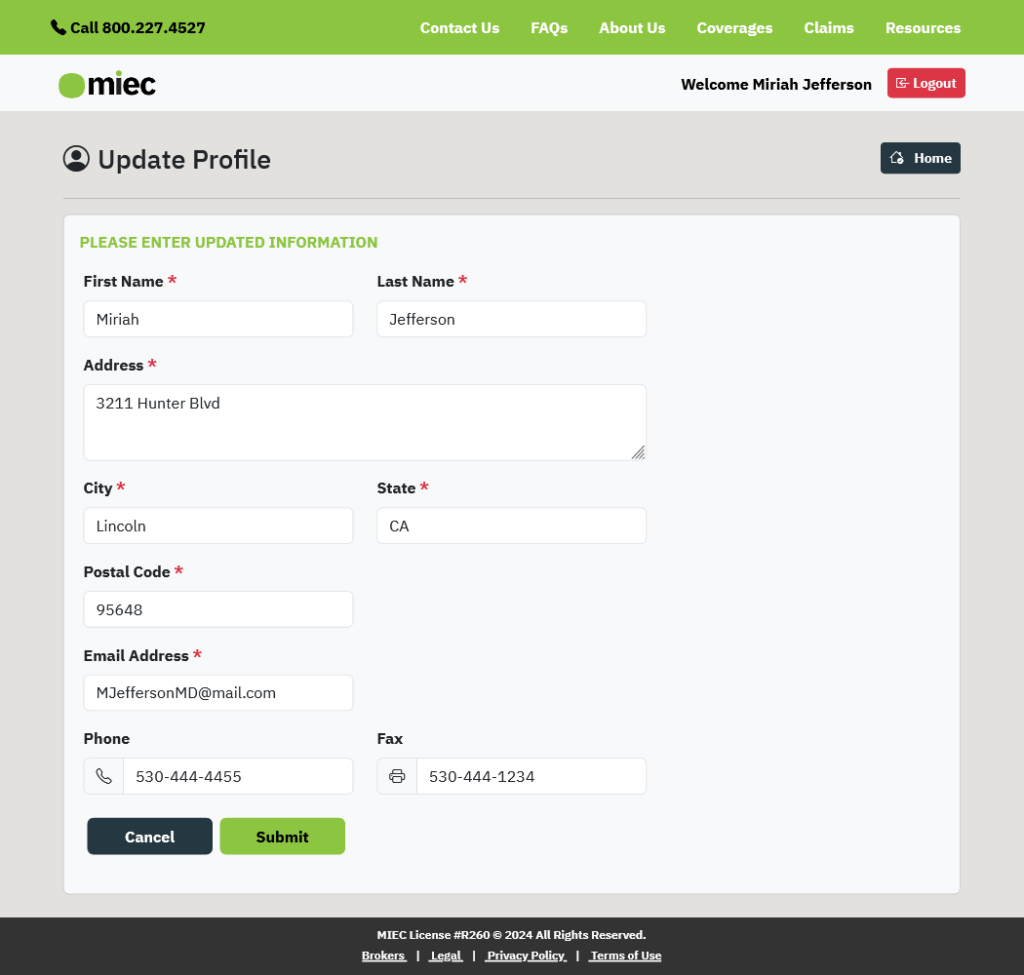
Once you've made the necessary changes, hit submit, and you will be shown a success message.
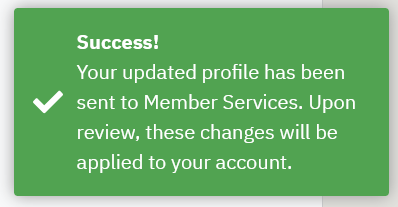
A Member Services representative will then review your update and apply it if there are no conflicts with your current policy.
Where can I get a Certificate of Insurance (COI)?
From your dashboard click on the "Certificate of Insurance"tile.
Once you open this page you will see a section with drop-downs to generate new Certificates of Insurance (COIs), followed by a section for existing COIs, and lastly, any Claims History documents that an MIEC underwriter generated.
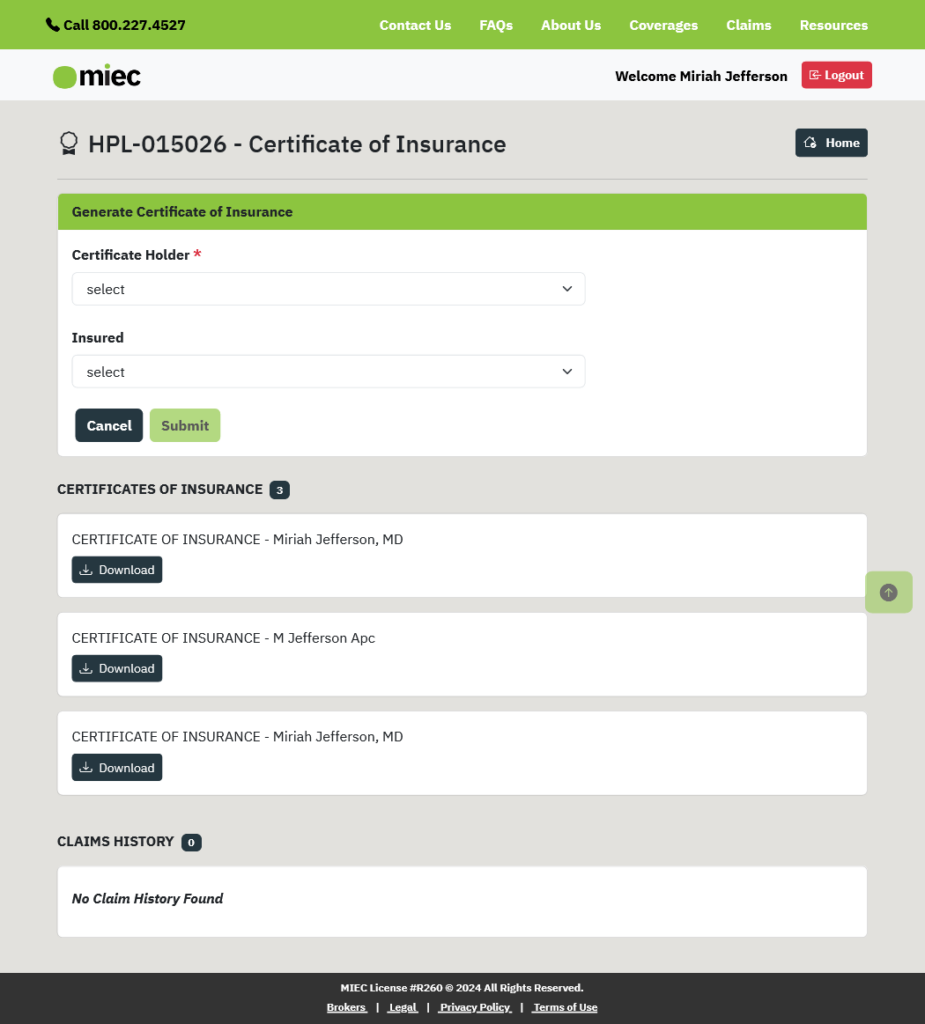
To generate a new COI select the certificate holder from the drop-down. Then select the insured. (If the certificate holder is the same as the insured, you don't need to select anything on the second drop-down.)
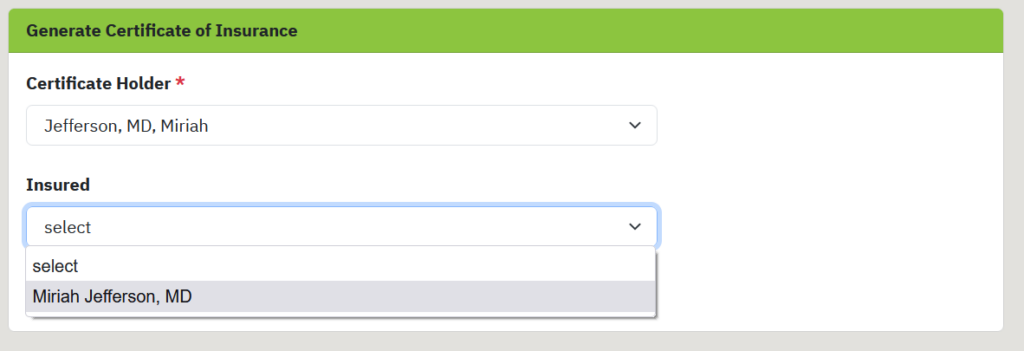
Hit submit and after a few moments of generating the new COI will appear at the top of the Certificates of Insurance section. Click download to view and save the document.
How do I get a copy of my Claims History?
Please contact Member Services if you need a copy of your Claims History.
- Email: service@miec.com
- Call: 800.227.4527
- From your dashboard via Send A Note
Where can I find my coverages?
From the main dashboard click on the coverages tile.
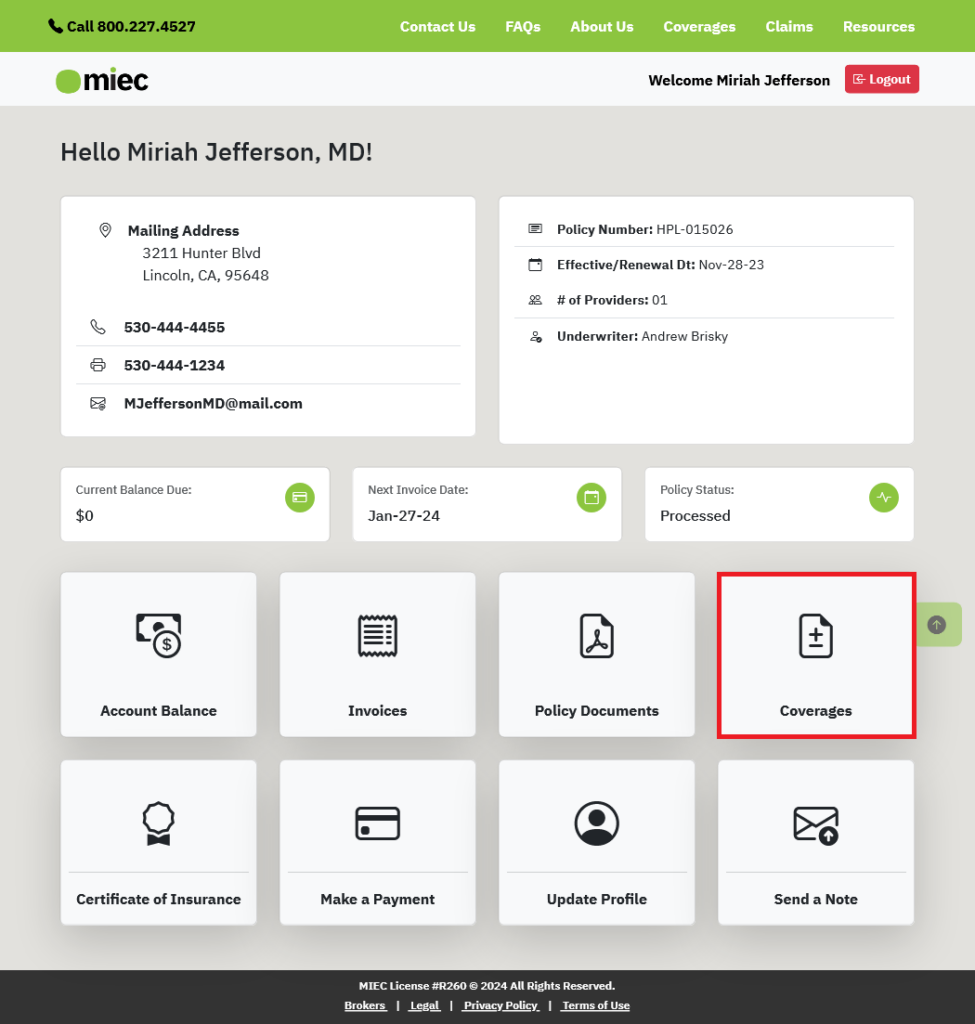
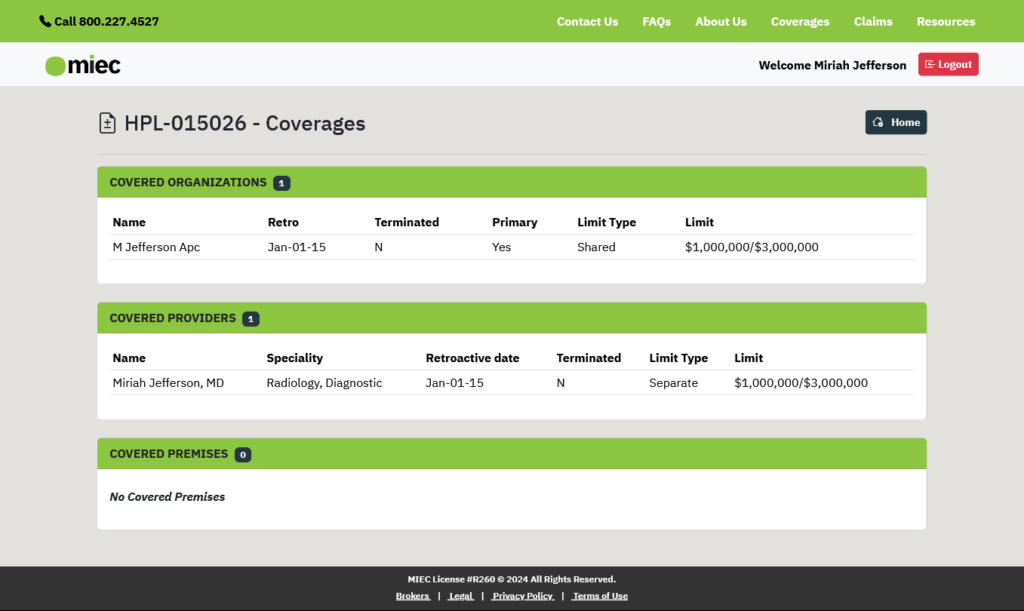
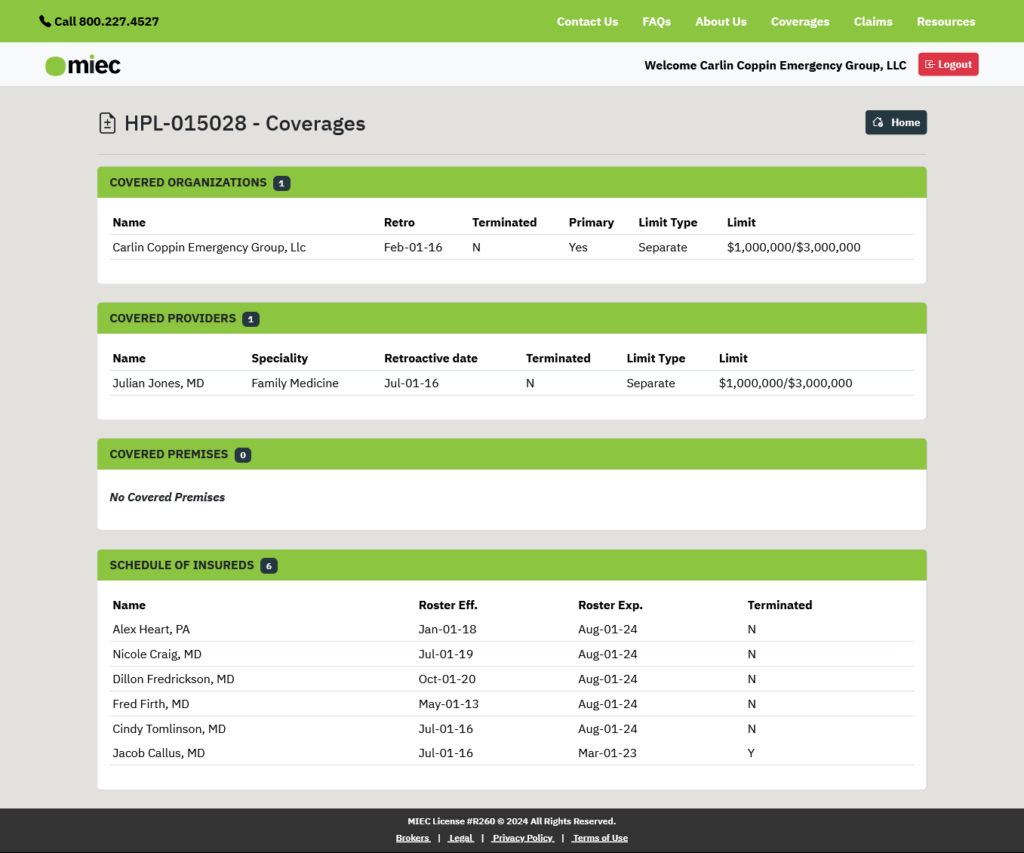
On this page, you will see all the covered providers, organizations, premises, and any scheduled insureds under your policy. As well as all relevant information such as retroactive date, if they are terminated, their specialty, limit type, and policy limit.
Example of solo practitioner's coverage page:
Example of a group with a schedule of insureds:
Who do I contact about a specific question on my policy?
If you have a specific policy or coverage question and need to speak to an underwriter, you have several options.
- From your dashboard, click on the Send a Note tile, which will notify Member Services and your underwriter.
- You can also call us at 800.227.4527 to speak to Member Services or request an Underwriter.
- Lastly, you can email service@miec.com or your underwriter directly.
How do I add or remove a covered provider/scheduled insured from my policy?
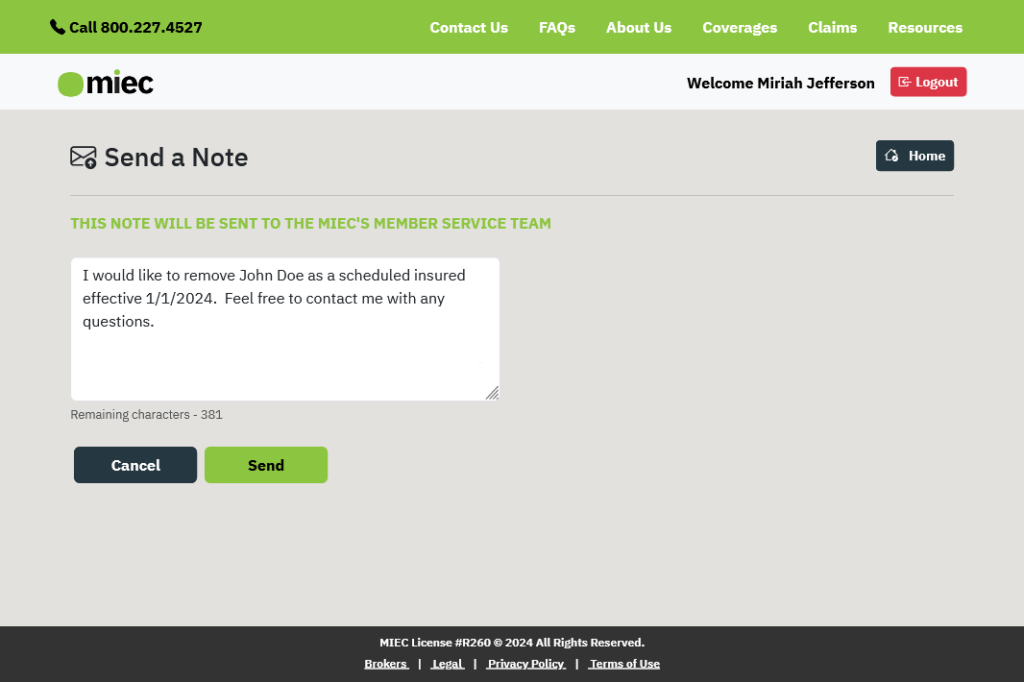
If you need to make a change to your policy by adding or removing a covered provider, scheduled insured, facility, or premise. Go to Send a Note from your dashboard.
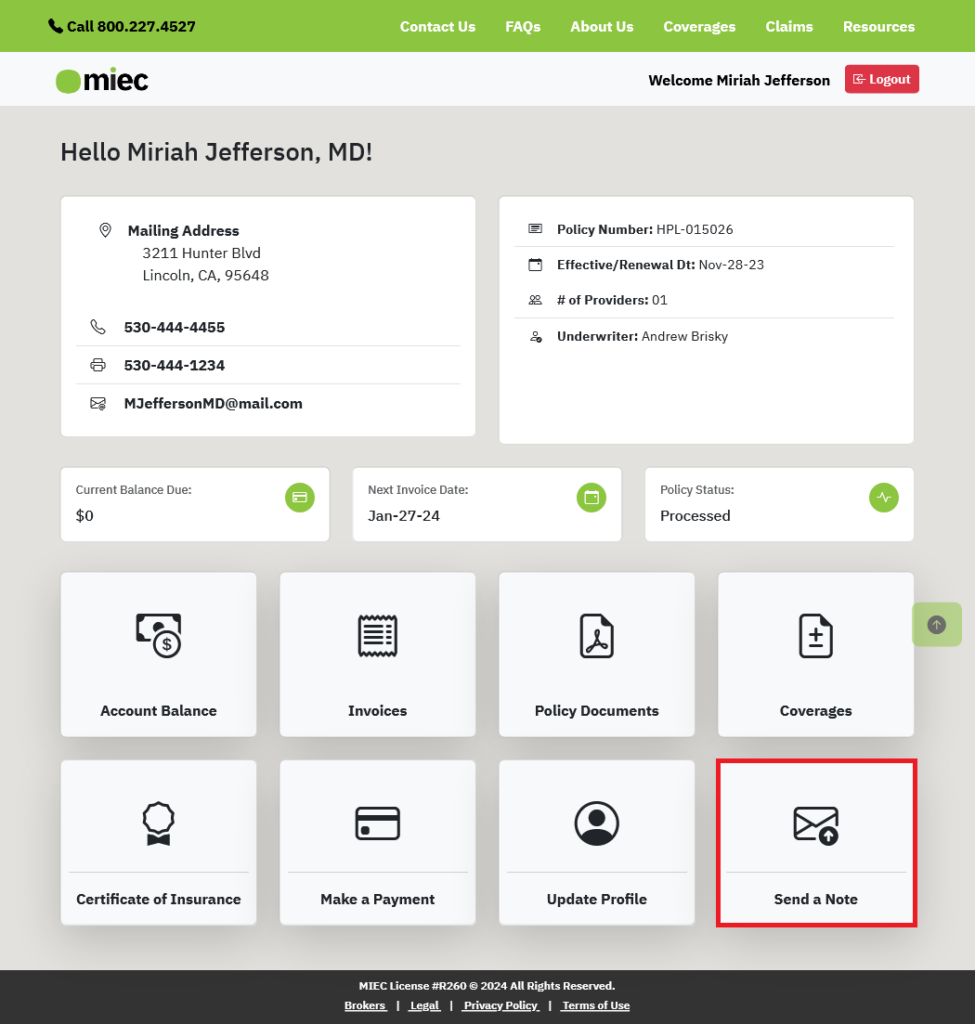
Enter the details of your request into the note field and hit submit. If any clarification or further details are needed Member Services or an MIEC underwriter will reach out to you. Once the request has been processed you will be notified.
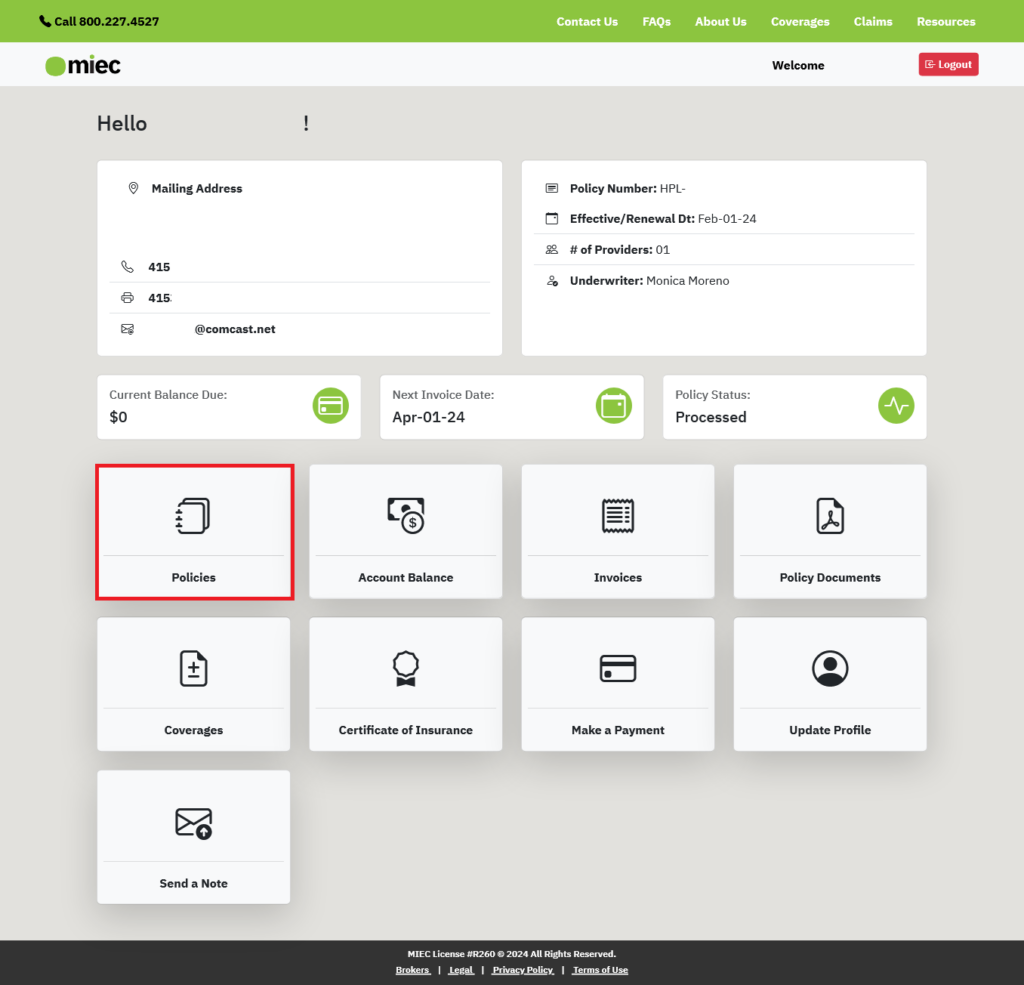
How do I view my policy and documents from previous years?
Policies that have been with MIEC for years will have an additional "Policies" tile appear on their dashboard. Clicking on the policies tile will allow you to view a separate dashboard that only shows the account details and documents from the selected year.
By default the policies page will open on the current policy year.
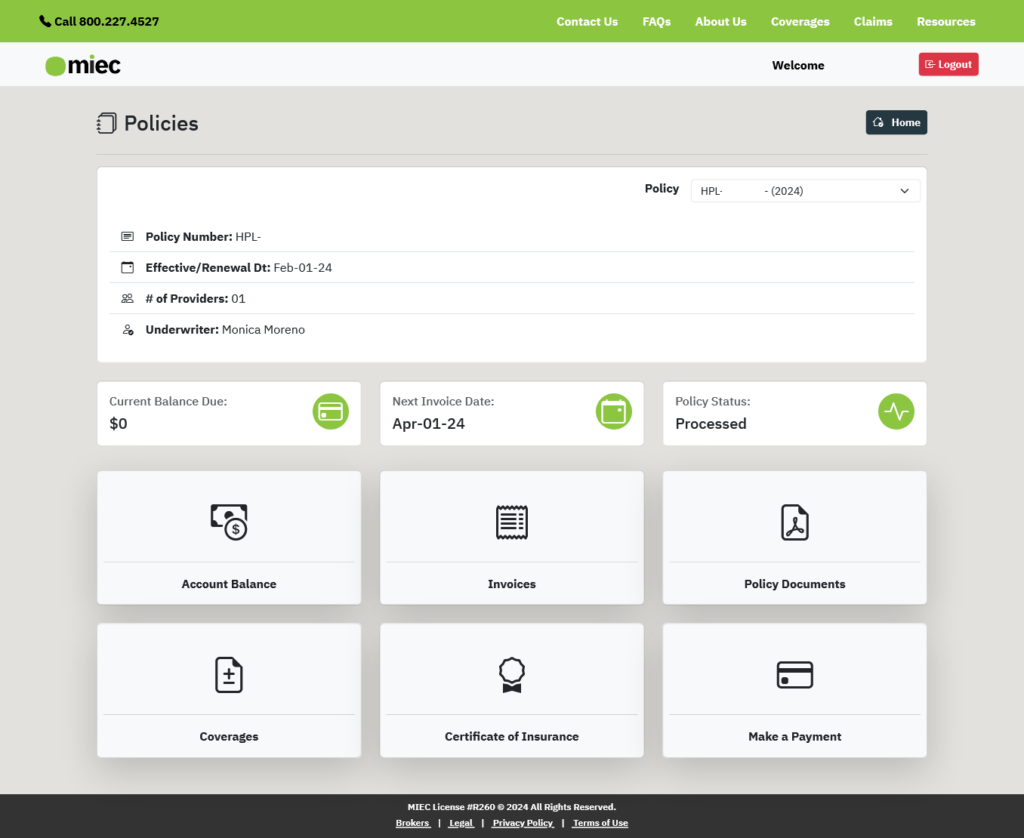
You can change that by clicking on the Policy drop-down and selecting the desired year. Currently, you can only view policies that were active when we transitioned to our new policy management system in 2022.

Once the desired year is selected you can navigate it as you would the other dashboard to view historic account balances and transactions, policy documents, coverages, etc.